1. 参考资源
https://www.bootcss.com/p/git-guide/
2. 打标签
2.1 显示本地 tag:
git tag2.2 创建tag
git tag -a v1.4 -m "my version 1.4"
-m 选项指定了一条将会存储在标签中的信息。 如果没有为附注标签指定一条信息,Git 会启动编辑器要求你输入信息2.3 查看标签信息
git show2.4 推送本地标签到远程
默认情况下,git push 命令并不会传送标签到远程仓库服务器上。 在创建完标签后你必须显式地推送标签到共享服务器上。 这个过程就像共享远程分支一样——你可以运行 git push origin <tagname>
git push origin v1.5推送本地所有标签到远程
git push --tags2.5 删除本地tag
git tag-d Remote_Systems_Operation2.6 用push, 删除远程tag
git push origin :refs/tags/Remote_Systems_Operation
删除操作实际上就是推送空的源标签 `refs`:2.7 删除远程分支
git branch -r -d origin/branch-name git push origin :branch-name3. 远端管理
添加远端
git remote add origin https://github.com/paulboone/ticgit列出所有的远端
git remote -v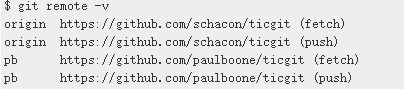
从远端拉取
git fetch origin推送到远端
git push origin master删除远端
git remote remove origin重命名
git remote rename old_name new_name修改远端地址
git remote set-url origin <new_url>4. 分支
创建并切到新分支
git checkout -b feature_x切回主分支
git checkout master删除分支
git branch -d feature_x推送分支到远端
git push origin feature_x5. 合并和更新
更新本地仓库
git pull合并
git merge <branch> master6. 开源仓库贡献
#fork the VS Code repository
git clone https://github.com/<<<your-github-account>>>/vscode.git
cd vscode
git checkout main
git pull https://github.com/microsoft/vscode.git main

Manage any merge conflicts, commit them, and then push them to your fork.7. 清除历史记录
- 进入仓库,拉一个分支比如名为 latest_branch
git checkout --orphan latest_branch–orphan 创建一个无任何历史记录的孤儿分支
- 添加所有文件到上述分支并提交一次
git add -A
git commit -am 'initial commit'- 删除 master 分支
git branch -D master- 更改当前分支为 master 分支
git branch -m master- 将本地所有更改 push 到远程仓库
git push -f origin master-f 强制push
- 关联本地 master 到远程 master
git branch --set-upstream-to=origin/master对 gitee 用户,因为 gitee 目前限制单个仓库大小为 1024 MB,清除完历史记录后,还要去项目主页 设置下做一下存储库GC
8. 设置代理
// 添加代理
git config --global http.proxy socks5://127.0.0.1:7890
git config --global https.proxy socks5://127.0.0.1:7890

// 取消代理
git config --global --unset http.proxy
git config --global --unset https.proxy第二种:仅 github.com 走 clash 代理,因为可能有的朋友公司内网的 git 仓库无需走代理
修改~/.gitconfig
// 添加代理
git config --global http.https://github.com/.proxy socks5://127.0.0.1:7890
git config --global http.https://github.com/.proxy socks5://127.0.0.1:7890

git config --global http.http://github.com/.proxy socks5://192.168.0.42:7890
git config --global http.https://github.com/.proxy socks5://192.168.0.42:7890

// 取消代理
git config --global --unset http.https://github.com.proxy
git config --global --unset https.https://github.com.proxy

[http "https://github.com/"]
  proxy = socks5://192.168.0.42:7890
[https "https://github.com/"]
proxy = socks5://192.168.0.42:78909. 生成密钥
ssh-keygen -t rsa -b 4096 -C "whyzi@qq.com"10. 第一次
git config user.email "bob@example.com"git config user.namezyx- 禁止自动转换换行符
git config --global core.autocrlf false11. 加速
12. Git 加速
全局代理:
git config --global http.proxy socks5://127.0.0.1:1080
git config --global https.proxy socks5://127.0.0.1:1080
取消:
git config --global --unset http.proxy
git config --global --unset https.proxy
只针对部分域名代理(推荐)
git config --global http.https://github.com.proxy socks5://127.0.0.1:1080
git config --global https.https://github.com.proxy socks5://127.0.0.1:1080
git config --global --unset http.https://github.com.proxy
git config --global --unset https.https://github.com.proxy
git config --global --list 显示所有配置